Hello, I blog!
I share all my sporadic and toilet thoughts in here, because I am random like that.
A gift to my favourite couple
So my favourite couple Grace and Douglas recently got engaged! In Switzerland no less. Woohoo! It got little ol’ me so excited that I just had to get them something. :P
Store-bought gifts are just so tacky, and I always liked DIY-ing gifts. So, why not?
I ended up painting tees for them – playing around with Douglas’ last name which is ‘Fun’. Originally thought of “Mr Fun” and “Mrs Fun” (yes, how original that is) but later decided that it would look odd if they were wearing their tees separately. So, I had think of slogans that would still make sense.
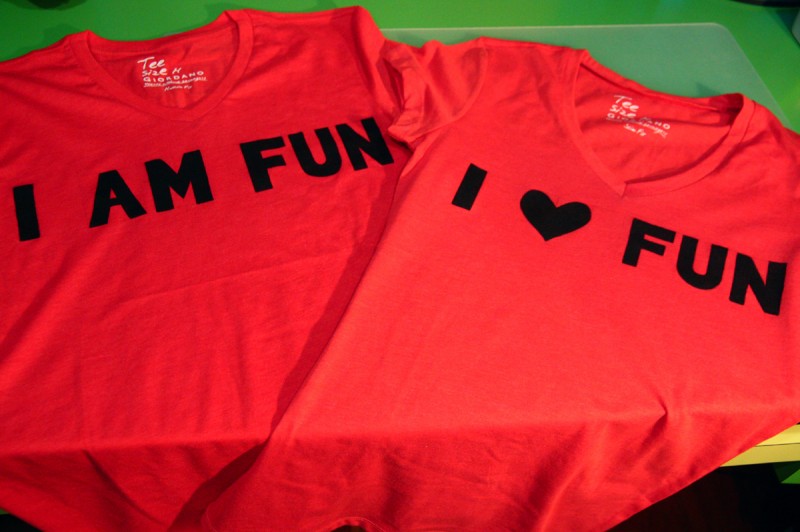
Viola, homemade couple t-shirts!
I finally decided on “I Am Fun” and “I (Heart) Fun”.
Tracing the letters (and especially the heart) proved to be a challenge – I had no stencils to fall back on apart from a 4B pencil and a ruler. Painting in the letters without going beyond the lines was an even greater challenge. (It was midnight, and I was pretty sleepy.) But still, they turned out awesome.

All packed and ready to go!
Hurrah!
If you’d like a detailed post on how I paint my t-shirts, you may want to check this out.
Sidenote, the plain tees were from Giordano. Pretty awesome material too – soft and comfy – with a wide range of colours. I might even want to get some to DIY more tees for myself. We’ll see.
Tee-painting in progress
I’ve been wanting to do this since forever but have been holding out for years. One, because I had little or no faith in my painting abilities – especially when it comes to fabrics. Two, I didn’t have any good-quality plain tees on hand and was too lazy to head out to source for one.
So, when a plain white tee (of very decent cotton quality) landed on my lap (thanks to the sample t-shirt sourcing done by my work company a coupla’ months ago), it was a painting opportunity screaming for my attention.
Additionally, when I spotted a giant ‘Sales!’ banner at Spotlight – Singapore’s largest fabric and craft store – the opportunity began screaming even louder. I managed to get DYLON black fabric paint at 20% off. Whee.
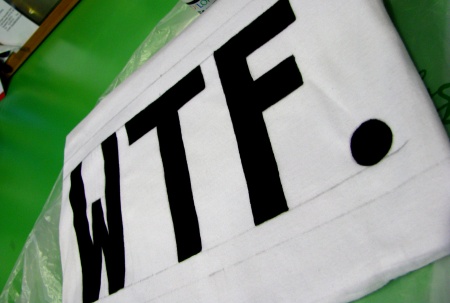
I began by manually drawing out letters using a blunt pencil. (Yes, manually. No stencils were involved here because I had none. I measured the dimensions of the tee like crazy to ascertain where exactly I wanted the letters and that they were positioned symmetrically. I’m that anal. :P)
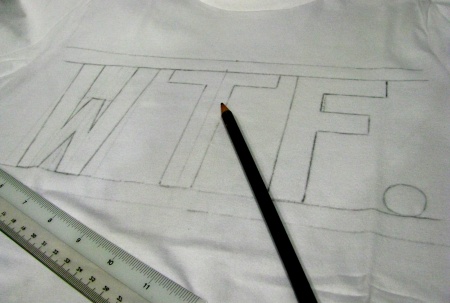
Drawing out the letters.
If you intend to do a similar tee but is too lazy to draw out the letters manually, you can create your own stencils by printing out letters on light cardboard and cutting them out.
And yeah, I know your eyes are boggling right now at the choice of letters on the t-shirt. I’ve been wanting a t-shirt with “WTF” printed on it since forever and I can’t seem to find them anywhere. So I decided to make my own.
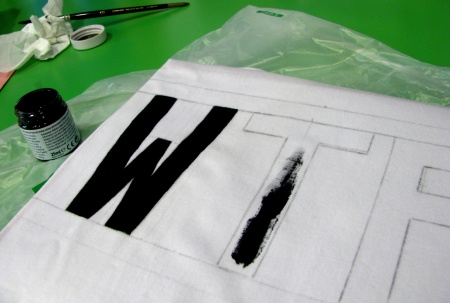
Painting in the letters with fabric paint.
Following which, I filled in the letters with a soft brush dipped in the fabric paint. Because I wasn’t using stencils, this was pretty tricky especially when it came to ensuring the edges of the letters were perfectly straight. (Well, they weren’t in the end. But the very slight jaggedness was not very noticeable unless you looked very closely.)
Thankfully, I had decently steady hands so the outcome turned out pretty well.
Leaving the tee out to dry.
I left the tee out to dry for approximately three hours. Actually, the required drying time was much less than that but I just wanted to be sure. (First time painting a t-shirt, remember? Plus, I was really worried I might screw up something – although everything was pretty smooth thus far.)
After drying, iron over the letters (to set the paint permanently) with an electric iron on the highest possible heat setting, and a cloth placed over the letters (no direct heat contact here – the last thing you’d want is a t-shirt on fire!). The instructions on the bottle of fabric paint called for 1-2 minutes, but I did this for 4-5 minutes. (Weeeell. Just wanted to be sure again.)
Thus, behold!
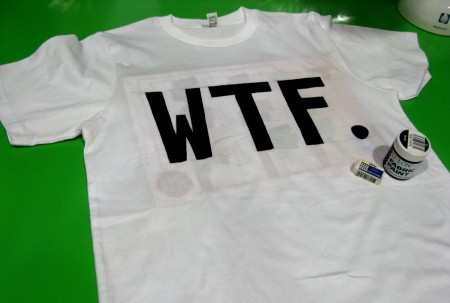
The end product!
Oops, pardon that magazine placed beneath the words. I wanted to separate the painted side from the back of the tee for a while more … just to be sure. (Yes, again. Hahaha.)
Now that the tee painting is complete, it’s time for the last crucial step – putting the tee through its first wash.
I really hope the fabric paint behaves the way it is expected to and stays on the t-shirt.
I do not want to end up with a blackish stained, pseudo tie-dyed shirt to account for the amount of (extremely anal) work I’d put in!
Farewell, little cousin.
I’ve been busy recently, working on a farewell gift for one of my favourite cousins – David.
This young fella’ would be heading to Vancouver for the next two years or so to pursue his Junior College education. (Singapore’s Education System has once again, proven to be too much of a struggle.)
It was a rather sudden, I must say. He only made his decision slightly more than a month ago and he’s leaving in … three days.
I’d feel really odd without David around – the cousin I practically grew up with. Those little gossip sessions and heart-to-heart talks in my grandmother’s house, all those times going crazy in public, our families having dinner, lunch or shopping sessions together, how he’d always drop me a message or ask how I am (about my health) and of course, our thrice-annually overseas trips together.
He’s my little buddy. How can I cope for two years without him? :(
Ah well, no time to grovel about it. I wish him the best of luck, to work hard and play hard at the same time. Also, I wish a pretty Canadian girlfriend upon him. (Oh, and I’ve asked him to find me a cute Canadian girl too. ;))
Anyway, back to the gift I’ve prepared for him.
Basically, it comprises two posters – which I’m going to demand he displays on the wall of his new room – one comprising photographs depicting our past happenings together with the family and extended family, and the other comprising messages from various family members and friends (bordered with even more photos).
At least in a way, he’d be taking all of us with him to Canada.
Thus, BEHOLD!
David’s farewell gift bundle.
It took several pieces of coloured paper, two black plastic boards, three tubes of glue, several photos, scissors and a very tired pair of hands to create this.
It was made with love, David dear. I hope you like it.
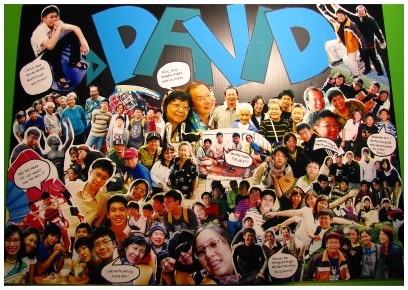
Board 1 – Photographic memories.
This is the first board I’ve mentioned about, supposedly depicting David’s life with his family here in Singapore, all thanks to my vast collection of photos from family outings and travels throughout the years. Not to mention some rather err … unglam pictures of David himself too.
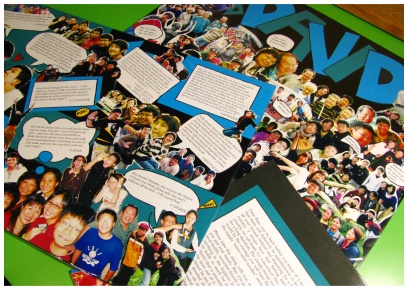
Now, presenting the other board.
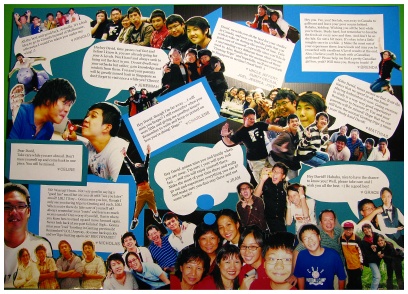
Board 2 – Sweet farewell messages.
I’ve started soliciting messages from family and friends (and those who know David) via Facebook slightly more than a week ago. It wasn’t easy, since some rarely log into Facebook (and I have no other means to contact them), so it was a crazy waiting game until I’ve more or less received all the messages I needed.
The messages were nicely formatted on Microsoft Powerpoint, printed and cut into little speech or thought bubbles (or plain ol’ squares) for the board.
I’m quite pleased with the overall outcome.
Continue reading for more in-depth pictures of the farewell gift bundle.
WARNING: Image intensive!